Deploy NND Sync
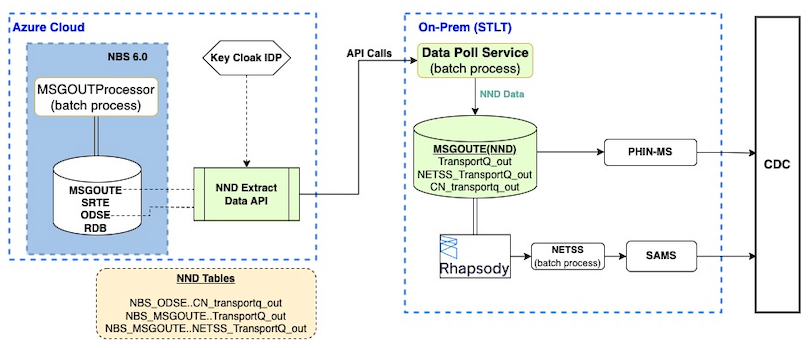
Use these instructions to deploy the on-premises Data Sync service that extracts data from the Modernized NBS cloud implementation and supports ongoing Notifiable Disease message transmission to CDC. Complete Validate API endpoints before starting this page.
This page is part of the optional NND Service (Data Sync) section. CDC is evaluating long-term support for this service. If your STLT has a use case, contact nbs@cdc.gov.
On this page
Prerequisites
To sync data for NNDSS through the NBS 7 Data Sync service, you need the following:
- Complete Validate API endpoints.
- Keycloak client ID and client secret - Retrieve these from your Keycloak instance. In the NBS realm, navigate to Clients >
nnd-keycloak-client> Credentials > Client Secret. - Data service URL - Retrieve this from your NBS environment.
- Release materials/package - CDC provides this as a .zip file with each release.
- Install the Rhapsody engine and IDE.
- Install a Microsoft SQL Server database on a different machine, or repurpose an existing SQL Server database (Rhapsody should have access to it).
- Java 21 or higher
Components for NND Sync
NNDSS Data Sync service includes:
data-sync-service.jarnetss-message-processor.jar.cmdfiles (only for Windows environments).sqlfiles (to create NND Database and required objects)
Set up the Data Sync service for NNDSS
Download the Data Sync service files (.jar, .cmd, and .sql) from the NEDSS-NNDSS v7.13.0 release page. Under Assets, download the v7.13.0.NEDSS.NBS.Modernized.Documentation.zip file and locate the files in the data-sync/NND_SERVICE/ directory. Save the files to a secure directory with executable permissions to run the services.
Step 1: Configure command or execute script (.cmd file)
- The release materials include a configurable
.cmdscript file that runs the Data Sync service. - Replace the values for arguments in the file with your own.
- Important: Do not allow any space between the argument name and value.
- Example:
arg_name=arg_value
- Example:
Reference for arguments: README
Step 2: Build or reuse the database and database objects
- Create a separate database and tables for the new service.
- Use the provided
.sqlscripts to create the required database and tables.
Tables required in the new database:
TransportQ_outCN_transportQ_outNETSS_transportQ_out
Ensure the database is accessible from Rhapsody.
Step 3: Update connection details on Rhapsody routes
- Update only variables in the route’s database components.
- Point them to the new database and tables from the previous step.
Steps:
- Log in to the Rhapsody console.
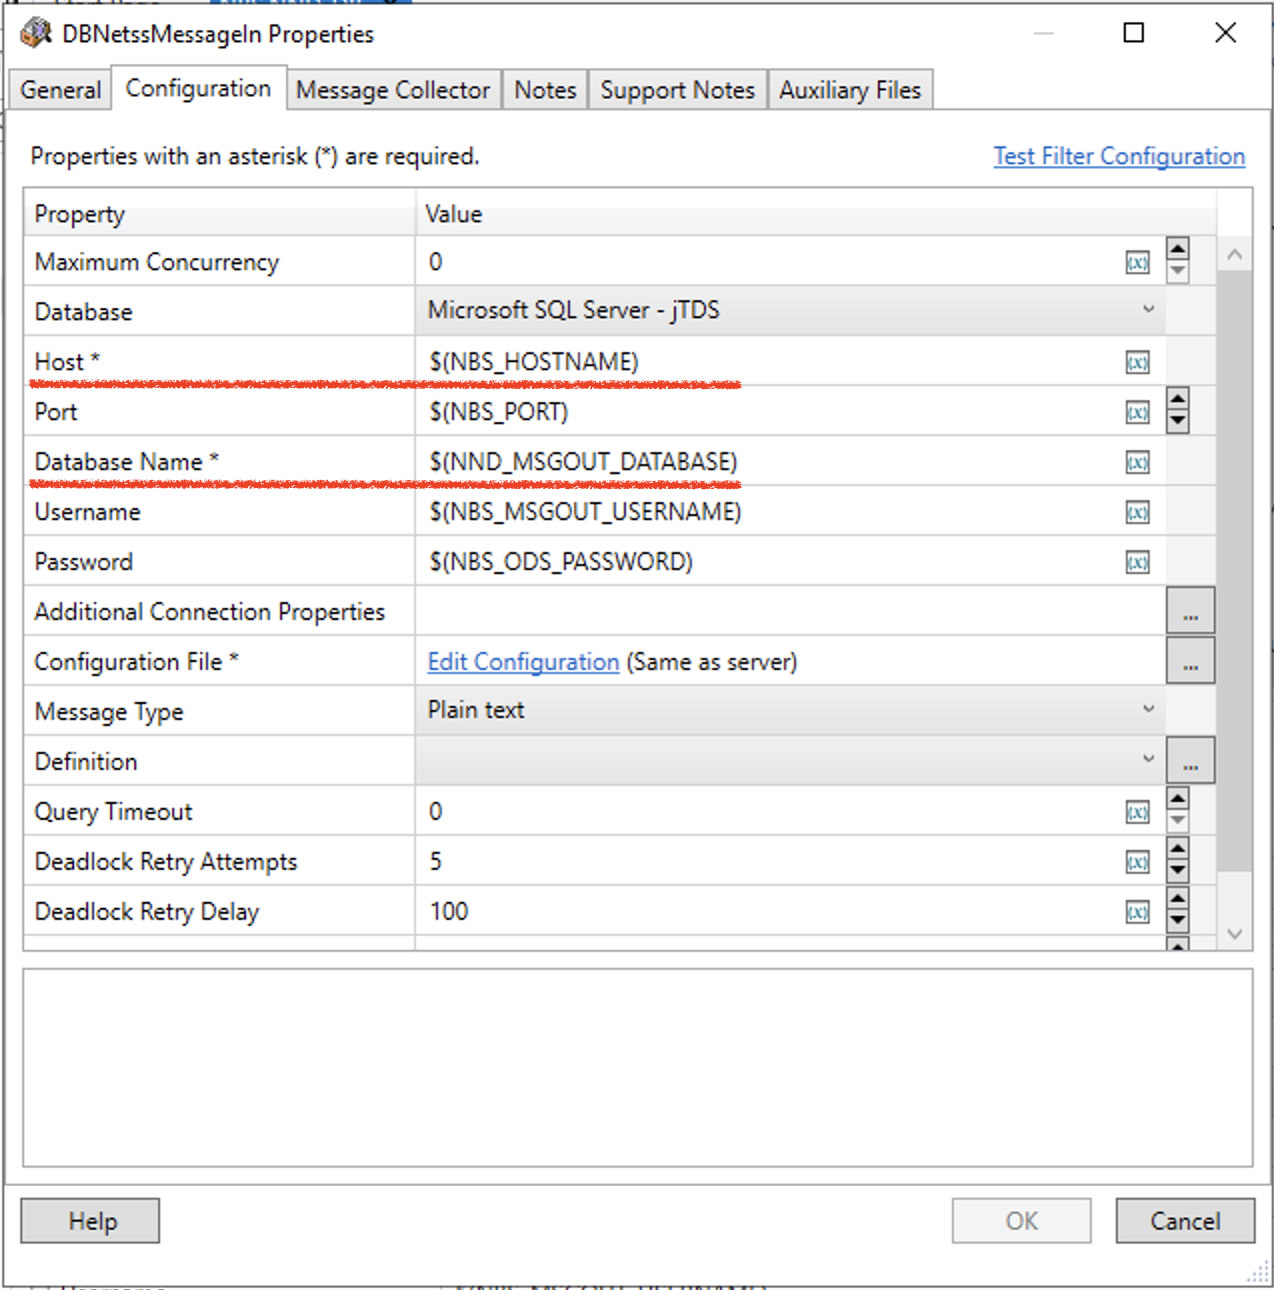
- Open Variables Manager and confirm the route has the correct hostname and new database name.
-
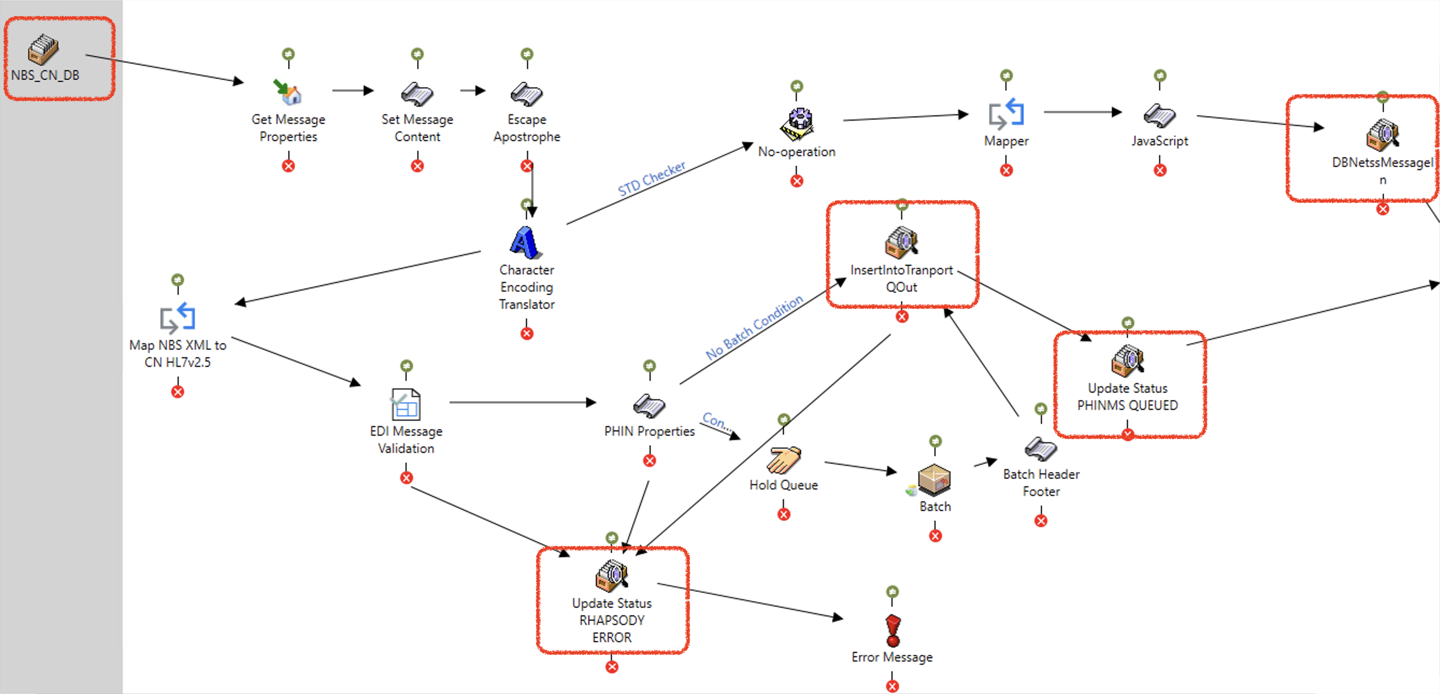
Open all database components in the route and verify they refer to the correct database variable:
List of database components to update in the Rhapsody route (highlighted in red boxes):
Step 4: Configure and verify PHINMS and SAMS
PHINMS
- Verify and update database connections for the existing PHINMS setup.
SAMS
- Verify that the file drop-off location in NETSS service parameters matches the location that SAMS reads.
Next steps
Continue to Deploy Data Availability.